Since my coding bootcamp ended, I have been working on simple React and JavaScript projects and learning along the way. Last week, I came across the challenge of generating a progress bar using React when a button is clicked. The challenge was to display multiple progress bars when the ‘Add’ button is clicked. Here is […]
Category: JavaScript

Earlier this year, when I attended the UC Berkeley web developer bootcamp, I learned about GraphQL. If you have been using React for a while, using GraphQL can be a game changer. There is an initial learning curve especially if you, like me are used to working with PHP and MySQL even though there are […]
Categories
Readme file generator
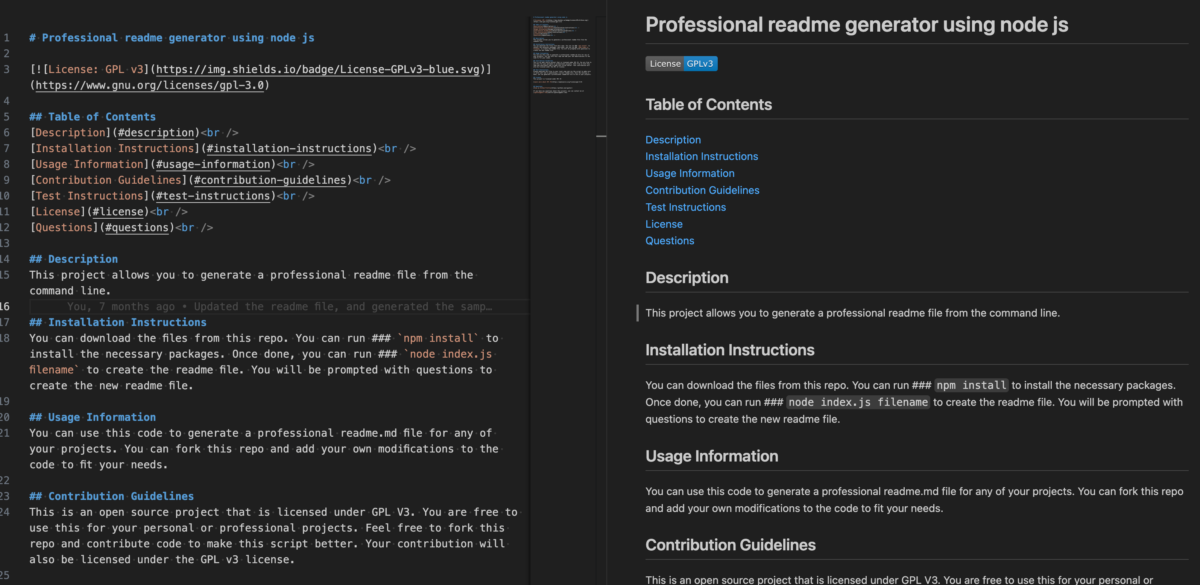
Why are readme files useful? The readme file tells users about your project. It contains the license, installation and testing information, FAQ’s, contact information and more. This file gives the user all they need to know about the project. You can add a few images and videos to show how the code works. There are […]
Categories
Weather Dashboard
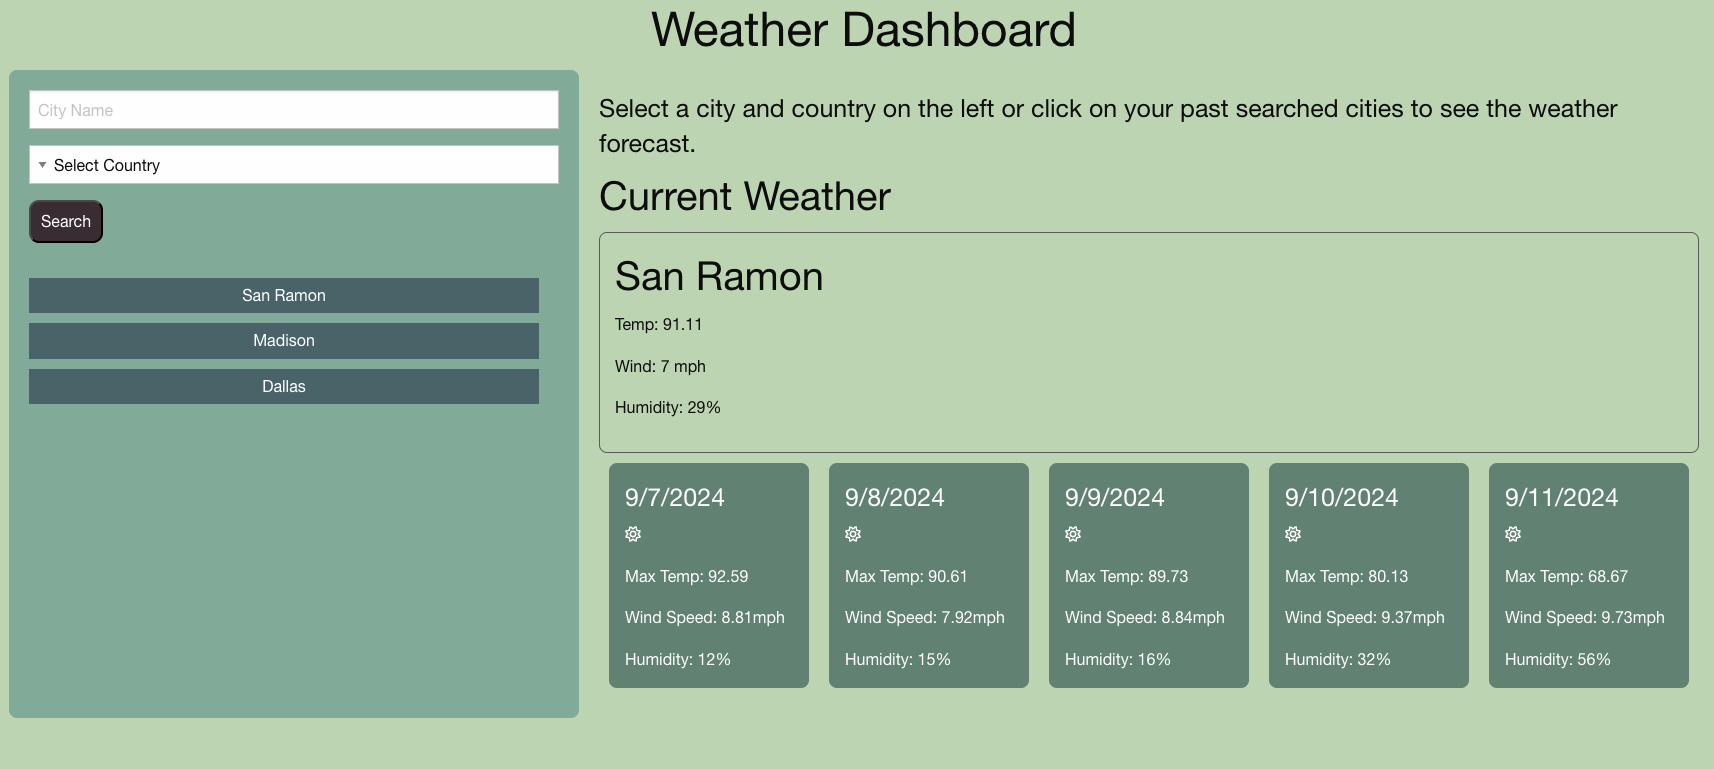
The weather dashboard is a simple JavaScript program to view the weather for the specified city. A month ago I finished the coding bootcamp given by UC Berkeley. It was a fast paced bootcamp teaching front end web development skills. It was a six month course and I learnt about everything from Vanilla JavaScript, Node […]
Many WordPress themes and plugins come with some demo data (posts and pages) which the users can install when they activate the plugin. These WordPress posts and pages are designed to give the users a head start on setting up the theme or plugin and give them some readily available dummy data to play with. […]

WordPress provides many different ways to customize your site. You can build a custom theme that is unique to your site or you can use an existing theme and tweak it to suit your needs and style. In all these years of working with WordPress, I have had countless occasions when I had to add […]
Categories
US Flag – Using Canvas Element

The canvas tag is a new HTML tag which is used to draw graphics using JavaScript. You can learn more about the canvas tag and its basic usage here. Since it is a relatively new tag, it does not render in all the browsers. For those browsers which do not support the canvas tag, you […]