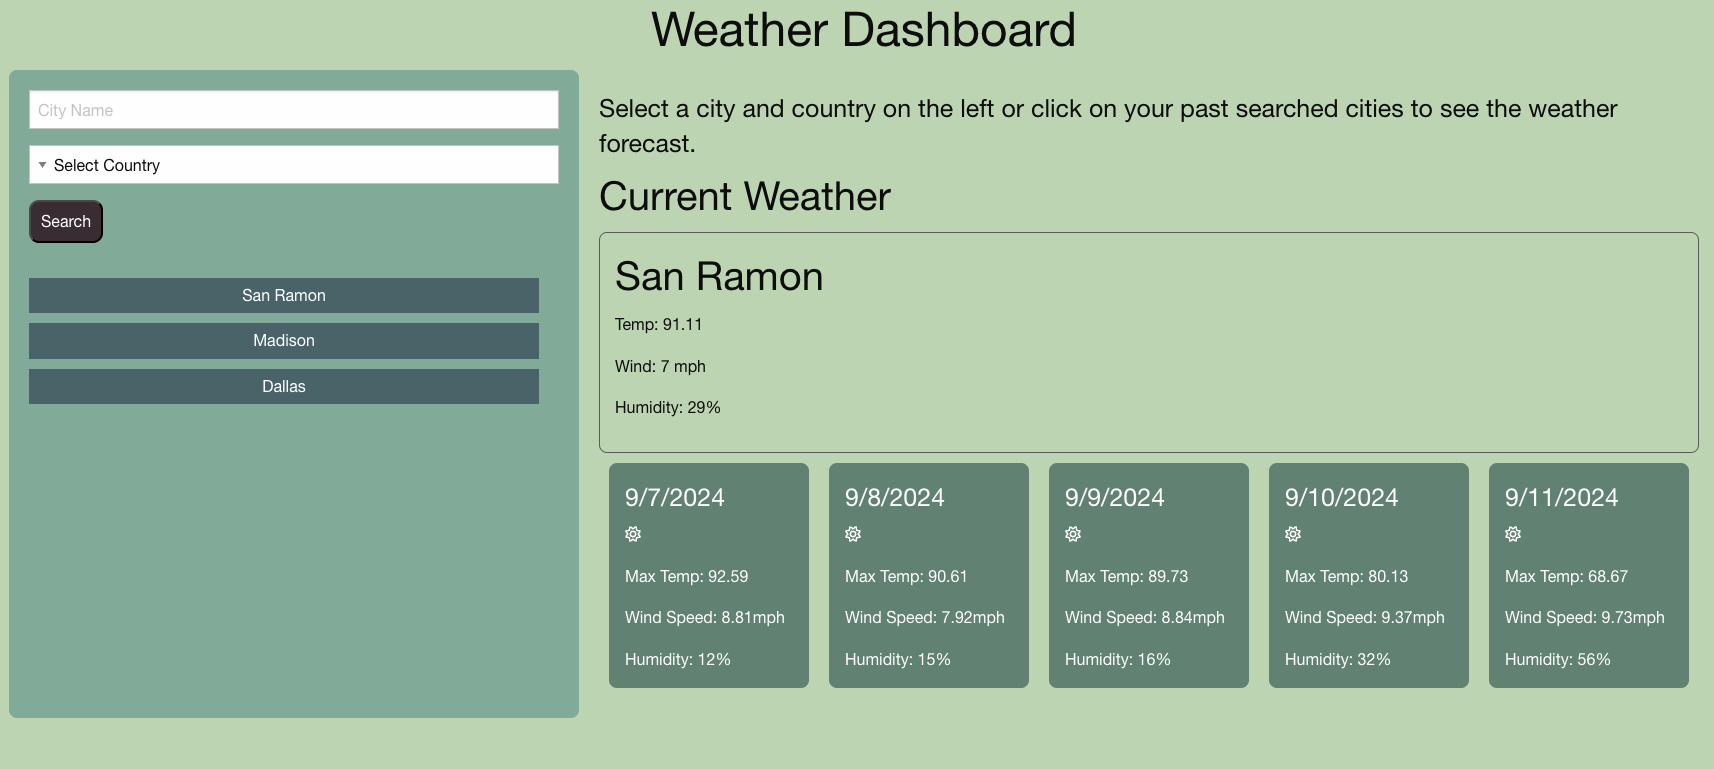
Shortcodes have been part of WordPress for a long time. As the new block editor is gaining users and popularity, converting these shortcodes to blocks will be helpful. Gutenberg blocks are not only useful for creating custom page layouts, but also make the website building experience better.
When Gutenberg blocks can be used in place of shotcodes, it improves the overall user experience. As we are making this transition to blocks, we need to pay attention and make sure that the inspector controls are user friendly.
When converting a shortcode to a block, one of the first things to do is to figure out how you want to display the options in the sidebar. There is no one size fits all option here. The type of user interface we want to show ideally depends on the type of attribute.
I will use the business directory block as an example as it has many different types of attributes. Each attribute is shown in the Inspector Controls to give the user finer control over displaying their business directory listings.
Controls for simple list attributes
Some of the attributes like format, text, orderby, etc were easy to build in the block sidebar. These have a few static options to choose from and could be put into a select dropdown.
const setDirectoryLayout = format => {
props.setAttributes( { format } );
};
Options with boolean values in the shortcode
Many of the shortcodes we use have attributes that take in boolean options – true or false. It might also be a ‘yes’ or ‘no’ to make it easier for users to understand and use in the shortcodes. The best way to display them in the block sidebar, is to use a toggle button. You can also use a simple dropdown which is easier, but I feel a toggle button is more intuitive.
The business directory shortcode has the option to display the alphabet list at the top so that businesses can be sorted by their first letter.
The shortcode has it as a Yes or No option. In the block, the option can be simply switched on or off using a toggle button.
'alpha' => 'no', //options: yes, no
'show_category_filter' => 'no', //options: yes, no
The toggle button did present a couple of challenges. The toggle button gives the output as true or false, but our shortcode needs the values ‘yes’ or ‘no’. So, the true or false values need to be converted to string values before being passed into our shortcode function.
Another issue was that the toggle attribute needs to be the type ‘boolean’ and the shortcode attribute was the type ‘string’.
One of the important things to remember when converting shortcode to blocks is that we need to keep the name and the type of the attribute the same. As the original attribute cannot be modified in the block, I added another attribute ‘alphaToggle which is a boolean.
The toggle button is displayed using the alphaToggle. When the option is toggled, the alpha option is set which gets passed onto the shortcode function.
This just needed a little bit of tweaking to make it more user friendly and intuitive. I also feel that the toggle buttons are easier to use than a dropdown sometimes as we can visually see which ones are “on” and which ones are “off”.
In the next part, I will cover the dynamic dropdowns for custom taxonomies and displaying toggle buttons for each option in a single shortcode attribute.
Building responsive layouts using CSS Grid and Flexbox is easy. Few lines of CSS and the columns resize nicely based on the width of the page. CSS Grid or Flexbox takes care of resizing and the columns nicely stack as needed in smaller view ports. We can style these columns using media queries for different browser widths. If we want to add styles based on the number of columns showing on the page though, we need to use JavaScript.
When I was working on converting the Business Directory shortcode to a Gutenberg block, we added options to select the image size. This was a new option which was not in the shortcode. So, the users could choose the number of columns, the image to display (featured image or logo) and the size of the image along with other options while displaying their business directory listings.
They have the option to choose from 1, 2, 3 or 4 column layout or a responsive layout. When it came to styling the images and the text around it, it was not easy. We had to maintain consistency between the specific column layouts and the responsive layout.
The columns in the responsive layouts change based on the width of the page or the content width. We wanted the listings to look consistent in all formats. If the page had only one column, it should show similar to the one column layout, and if the page had 2, 3 or 4 columns, it should show similar to the other column layouts respectively.
This could probably be done using media queries, but it is not easy. The number of columns showing on the page depends on the width of the device and the with of the page itself, or to be specific, the content width of the page. If we used the Twenty Twenty theme with the default page layout, even on a desktop, the content width is smaller and the number of columns would be different when using the responsive layout.
Business Directory layouts with default and full width pages
Adding custom classes using JavaScript
To make the styling of the responsive columns easier, I used JavaScript to add specific classes to the responsive columns. gridColumnCount gives us the number of columns being displayed on the page. The outputGridData function adds the desired classes the specific selector. This function is being called when the page loads and also when the browsers is resized. So, the columnCount gets updated when the page width changes.
function getGridData () {
// calc computed style
const gridComputedStyle = window.getComputedStyle(businesslist);
return {
// get number of grid rows
gridRowCount: gridComputedStyle.getPropertyValue("grid-template-rows").split(" ").length,
// get number of grid columns
gridColumnCount: gridComputedStyle.getPropertyValue("grid-template-columns").split(" ").length,
// get grid row sizes
gridRowSizes: gridComputedStyle.getPropertyValue("grid-template-rows").split(" ").map(parseFloat),
// get grid column sizes
gridColumnSizes: gridComputedStyle.getPropertyValue("grid-template-columns").split(" ").map(parseFloat)
}
}
window.addEventListener("DOMContentLoaded", outputGridData);
window.addEventListener("resize", outputGridData);
function outputGridData () {
const gridData = getGridData();
const columnCount = gridData.gridColumnCount;
var images = document.querySelectorAll("#businesslist.responsive.cd_block .business .description a");
//alert(images);
for (i = 0; i < images.length; ++i) {
images[i].className = "grid"+columnCount;
}
}
The code adds the class grid1, grid2 etc to the specific selector. In this case, it is the “a” tag that holds the featured image or the logo. Once the classes are in place, adding styles is simple.
This ensures that no matter the page width, content width or the device width, the layouts will be consistent based on the number of columns being displayed. The image styles are dependent on the number of columns being displayed on the page. If the screen width is 1200px, but only two columns are displayed, images get floated to the left and the content floats around it.
WordPress shortcodes make it easy to add complex code to the pages. Now that the new editor is here to stay and we are all getting used to the new editor, it is important to make sure that the code that was available as shortcodes should now be given to the users as blocks. Converting the shortcodes to blocks makes it more visual and much easier to use. It also gives the users a better experience as they do not need to remember all the shortcode parameters or keep referring the docs as they set up their sites.
Converting the shortcodes to Gutenberg blocks is fairly easy, but it does require a bit of initial setup to build the blocks.
After setting up the initial JS build, you will now have the folders /src and /build in your plugins root folder. The src folder will hold all of your block code. It is best to create another folder blocks in the root folder of your plugin for all the block related functions. This will keep our blocks code separate.
Since, I wanted to create multiple blocks in the Business Directory plugin, I created folders inside the src block. The business_directory_block and the logo_gallery_block have the code for the respective blocks. Creating a folder for each block is better to keep the code separate and less cluttered.
Each folder has an index.js which includes the actual block code. Since @wordpress/scripts package is going to look for our block code in the /src/index.js file, we need to add the index.js files for each block here.
The easiest way to convert the shortcode to a block is to pass all the block attributes to the same function that is used for the shortcode.
In the Chamber Dashboard Business Directory plugin we have a shortcode that displays all the business listings. There are many parameters used with the shortcode to control what and how the listings are displayed.
Since we have all the parameters and the styles working like we want in the shortcode, it was just easier to use the shortcode function for the block as well. Also, if there are users who are still using the classic editor, they need the shortcode to exist. So, using the same function means that it is easier to maintain both the shortcode and the block.
Creating the block
Inside the business_directory_block/index.js, add the code to create the block using registerBlockType.
While creating the block, it is important to remember that all the parameters or attributes of the shortcode should be added in the block attributes section. Since we are using the same function as the shortcode, the attribute names should be the same in both the shortcode and the block.
The edit function
Next, we need to add the edit function for the block in edit.js. Here are the necessary dependencies for the edit function
The ServerSideRender allows us to render a preview of the dynamic block in the editor. Since it is best to use this for blocks that render heavily on existing PHP functions, it is perfect for this particular block. More info on ServerSideRender can be found here.
Inspector Controls
The edit function has the inspector controls for the block attributes. These controls can be used to modify the shortcode attributes. The block code shown above only shows four attributes for the purpose of this post. The actual shortcode has a lot more parameters.
There is an option to select the format which determines the number of columns for the business directory layout, an option to select one or more categories (which are custom taxonomies in this case) and an option to limit the number of businesses shown per page.
The format and the perpage options are simple dropdowns which pass the selected option to the shortcode function.
The category attribute in the shortcode is a string where you can pass multiple category slugs separated with a comma. To give the option to choose multiple categories, we need to have an array. So, I created a new attribute called ‘categoryArray’ which is an empty array by default. This stores the multiple selected categories.
In the php callback function, the values from the categoryArray are passed to the category attribute as comma separated string.
ServerSideRender uses the block’s call back function. Since we are passing attributes to the ServerSideRender, we need to register the block and its attributes in php.
The cdash_business_directory_shortcode is the function that renders the directory listings through the shortcode. We are just calling the same function and passing in all the attributes from the block into the function.
This will display the block with the business listings with the default values. When one of the values is changed using the inspector controls in the block settings, those values are passed to the shortcode function and the front end display is modified accordingly.
Working Business Directory block:
Get tips and tutorials on using the new block editor, WordPress themes and plugins!
I recently built a Mailchimp addon plugin for the Chamber Dashboard plugins. The plugin uses the Mailchimp api key to connect to Mailchimp and display the lists in the plugin options page. The admin can select a Mailchimp list to which new member emails can be automatically added.
Without Ajax, the user would have to save the api key first to display the Mailchimp lists dropdown. After they select the list, they would have to save the options again so that their list gets saved.
Using Ajax, it is easy to give them an option to save the api key temporarily and display the Mailchimp list. Once the user selects the list, they can save the options all at once.
Here is how to implement the Ajax functionality. The first step is to add the fields for api key and the MailChimp list.
Here is the callback function that renders the api input field.
function cdash_mailchimp_api_key_render($args){
//specifying the ajax url
$ajax_url = admin_url( 'admin-ajax.php' );
$options = get_option('cdash_addon_options');
if(!isset($options['cdash_mailchimp_api_key'])){
$options['cdash_mailchimp_api_key'] = '';
}
?>
<input type='text' name='cdash_addon_options[cdash_mailchimp_api_key]' id="cdash_mailchimp_api_key" value='<?php echo $options['cdash_mailchimp_api_key']; ?>'>
<br /><span class="description"><?php echo $args[0]; ?></span><br />
<?php
//Displaying the save button only if the api key is empty
if($options['cdash_mailchimp_api_key'] == ''){
?>
<button type="button" name="cdashmc_save_api_key" class="cdashmc_button" id="cdashmc_save_api_key">Save Api Key</button><span class="cdashmc_success_message save_api"></span>
<?php
}else{
//if api key is not empty, we are displaying the Delete button
?>
<button type="button" name="cdashmc_delete_api_key" class="cdashmc_button" id="cdashmc_delete_api_key">Delete Api Key</button><span class="cdashmc_success_message delete_api"></span>
<?php
}
}
The api key render form has a couple of additional buttons. The ‘Save Api Key’ is displayed only if the api key is not saved in the database. If there is a valid Api Key, the ‘Delete Api Key’ is displayed.
The ‘Save Api Key’ button also triggers the JavaScript. When the Save button is clicked, the script checks if there is an api key. If there is a valid api key, it generates a drop down of lists from Mailchimp associated with that api.
The api key from the field is used to connect to MailChimp to get the lists.
Here is the JavaScript and Ajax functions that do the trick.
jQuery(document).ready(function($){
// When the api key is saved, get the list drop down
$('#cdashmc_save_api_key').click(function (event) {
event.preventDefault();
var api_key = $('#cdash_mailchimp_api_key').val();
if(api_key == ''){
$(".cdashmc_success_message.save_api").text(" Please enter an api key.");
}else{
$.ajax({
url: ajaxurl,
type:'post',
data: {
'action': 'cdashmc_list',
'cdash_mailchimp_api_key': api_key,
},
beforeSend: function(){
// Show loading container
$("#cdashmc_ajax_loader").css("display", "block");
$(".cdashmc_api_key_msg").css("display", "none");
},
success: function(response){
$("#cdashmc_list").replaceWith(response);
$(".cdashmc_api_key_msg").css("display", "none");
$(".cdashmc_success_message.save_api").text(" API key successfully saved.");
},
complete:function(data){
// Hide image container
$("#cdashmc_ajax_loader").hide();
$('#cdashmc_save_api_key').hide();
}
});
}
});
$('#cdashmc_delete_api_key').click(function (event) {
$("#cdash_mailchimp_api_key").val("");
$("#cdash_mailchimp_list").hide();
$(".cdashmc_list_desc, .cdashmc_check_api_msg").hide();
$("#cdashmc_api_delete_notice").css("display", "block");
});
});
The Ajax function is calling the cdashmc_list function which connects to the server and gets the results back to the Ajax. cdashmc_list calls the function that uses the api to get the Mailchimp lists and send the list as a response back to the Ajax function. Here is the cdashmc_list function.
//Function to display the Mailchimp lists via Ajax
//Used the code from https://rudrastyh.com/mailchimp-api/get-lists.html to display the Mailchimp lists using the api key
function cdashmc_list(){
$options = get_option('cdash_addon_options');
if(isset($_POST['cdash_mailchimp_api_key'])){
$api_key = $_POST['cdash_mailchimp_api_key'];
}else{
$api_key = '';
}
$response = '';
if($api_key == ''){
$response = "No api key found";
}else{ //if there is an api key
$data = array(
'fields' => 'lists', // total_items, _links
);
$url = 'https://' . substr($api_key,strpos($api_key,'-')+1) . '.api.mailchimp.com/3.0/lists/';
$result = json_decode( cdashmc_mailchimp_curl_connect( $url, 'GET', $api_key, $data) );
if( !empty($result->lists) ) {
$response = "<select name = 'cdash_addon_options[cdashmc_list]'>";
$response .= "<option value=''>Select your Mailchimp List</option>";
foreach( $result->lists as $list ){
if ( $options['cdashmc_list'] == $list->id ){
$selected = 'selected="selected"';
}else{
$selected = '';
}
$member_count = $list->stats->member_count;
$response .= "<option value='$list->id' $selected>$list->name ($member_count)</option>";
}
$response .= "</select><br />";
$response .= "<span class='description'>Your members will be subscribed to this list.</span>";
}elseif ( is_int( $result->status ) ) { // full error glossary is here http://developer.mailchimp.com/documentation/mailchimp/guides/error-glossary/
$response = "<strong> $result->title :</strong> $result->detail";
}else{
$response = "<p class='cdashmc_check_api_msg'>Please check your api key.</p>";
}
//$response = $api_key;
}
die($response);
}
/We only need this as we are doing this only for the logged in users
add_action( 'wp_ajax_cdashmc_list', 'cdashmc_list' );
The last function we need is the cdashmc_list_render. The ‘<div id=”cdashmc_list”></div>’ which displays the Ajax response is inside this function. This function is almost the same as the cdashmc_list().
function cdashmc_list_render($args){
?>
<!-- Display the loading button when Ajax is running -->
<div id="cdashmc_list"></div><div id="cdashmc_ajax_loader">Loading...</div>
<!--Display this message when the api key is deleted -->
<div id="cdashmc_api_delete_notice">Please save the changes and enter the api key again to select the list.</div>
<?php
$options = get_option('cdash_addon_options');
if(!isset($options['cdashmc_list'])){
$options['cdashmc_list'] = '';
}
if($options['cdash_mailchimp_api_key'] == ''){
echo "<p class='cdashmc_api_key_msg'>Please enter your MailChimp API key.</p>";
}else{
$api_key = $options['cdash_mailchimp_api_key'];
// Query String Perameters are here
// for more reference please vizit http://developer.mailchimp.com/documentation/mailchimp/reference/lists/
$data = array(
'fields' => 'lists', // total_items, _links
);
$url = 'https://' . substr($api_key,strpos($api_key,'-')+1) . '.api.mailchimp.com/3.0/lists/';
$result = json_decode( cdashmc_mailchimp_curl_connect( $url, 'GET', $api_key, $data) );
//print_r( $result);
if( !empty($result->lists) ) {
?>
<select name = "cdash_addon_options[cdashmc_list]" id="cdash_mailchimp_list" >
<option value="">Select your Mailchimp List</option>
<?php
foreach( $result->lists as $list ){
?>
<option value = "<?php echo $list->id; ?>" <?php selected( $options['cdashmc_list'], $list->id ); ?>><?php echo $list->name . ' (' . $list->stats->member_count . ')'; ?></option>
<?php
//echo '<option value="' . $list->id . '">' . $list->name . ' (' . $list->stats->member_count . ')</option>';
// you can also use $list->date_created, $list->stats->unsubscribe_count, $list->stats->cleaned_count or vizit MailChimp API Reference for more parameters (link is above)
}
?>
</select>
<br /><span class="description cdashmc_list_desc"><?php echo $args[0]; ?></span>
<?php
} elseif ( is_array($result) && is_int( $result->status ) ) { // full error glossary is here http://developer.mailchimp.com/documentation/mailchimp/guides/error-glossary/
echo '<strong>' . $result->title . ':</strong> ' . $result->detail;
}else{
echo "<p class='cdashmc_check_api_msg'>Please check your api key.</p>";
}
}
}
The Chamber Dashboard plugins make it very easy to create member listings and display the businesses on the site. The shortcode used to display businesses has a few parameters that can be specified like pagination options, business details that need to be displayed like email, phone number, business category, membership level etc.
The business_category option will take in a category slug and filter the businesses accordingly. Although this is a useful feature, it is not the easiest way to filter the business listings by category. Each category listing should go on a different page. This is sometimes useful, but not if the user wants to just sort through the listings based on category. So, we wanted to add a category filter option to the shortcode.
Adding this new feature to the existing shortcode was the best way as it will ensure that the existing styling options can stay as is.
One of the important requirement was that the businesses from the selected category had to show up on the same page without the user getting redirected to a different page. This can be easily done with Ajax, but in this case using Ajax would have been a bit complicated. I just wanted to add the feature with minimal changes to the shortcode.
So, the first thing I added was another parameter to the shortcode – show_category_filter which controls the category filter dropdown. We did not want to show the dropdown by default. So, it is set to ‘no’ and if it is set to ‘yes’, the dropdown will be displayed.
Displaying the business categories dropdown
Displaying the dropdown is done using wp_dropdown_categories() and since I wanted this function to return the dropdown, I put it inside a function cdash_bus_cat_dropdown()
The dropdown should be displayed only when the category filter is set to yes.
This is how it will show on the front end. This is can be styled to match the theme.
Displaying the businesses from the selected category
Since there was already an option in the shortcode to take in the category, all I had to do was to pass the selected category into that parameter. Rest of if will be taken care of by the shortcode. To do that, I got the slug of the selected category and appended it to the url using jQuery.
jQuery("#cdash_select_bus_category").change(function() {
var category_value = $(this).val();
//var base_url = window.location.href.split('?')[0];
var base_url = $("#cdash_bus_list_page").text();
//alert(base_url);
var category_url = base_url + '/?bus_category=' + category_value;
window.location.href = category_url;
});
I got the value of the selected category using the $_GET and passed it to the $category parameter.
Adding a login/logout link to any WP menu is very easy using the wp_nav_menu_items hook. In the Chamber Dashboard Member Manager plugin, we wanted to give our users an option to add the login/logout link to the selected menu of their choice.
There was an option to enable the login/logout link which would add the link to all the available menu’s on the site, but this was not ideal. So, I added another option where the admins can select the menu they want the link to be added to.
There are a couple of steps involved in this process.
Displaying the list of available menus
The first step was to display a list of registered nav menus’ on the site using get_registered_nav_menus() and display them as checkboxes.
function selected_menu_render($args){
$options = get_option( 'plugin_options' );
if(isset($options['selected_menu'])){
$selected_menu = $options['selected_menu'];
}else{
$selected_menu = array(); //This is important because if there are no menu's selected, we want to initialize it to an empty array instead of a string.
}
$nav_menus = get_registered_nav_menus(); //gets the registered menu's on the site
//Adding name="plugin_options[selected_menu][] - this is important because, if we don't mention it as an array, multiple checkbox values will not be stored
//checked( in_array( $menu_name, $selected_menu ), 1 ) - This checks to see if the menu name is in the selected_menu array and if yes, the box is checked
if(!empty($nav_menus) &amp;&amp; $nav_menus != ''){
foreach($nav_menus as $menu_name =&gt; $menu){
?&gt;
&lt;input id="cdashmm_selected_menu" type="checkbox" class="cdashmm_selected_menu" name="cdashmm_options[cdashmm_selected_menu][]" value=&lt;?php echo $menu_name; ?&gt; &lt;?php checked( in_array( $menu_name, $cdashmm_selected_menu ), 1 ); ?&gt; /&gt;&lt;label name="cdashmm_selected_menu_label"&gt;&lt;?php echo $menu; ?&gt;&lt;/label&gt;&lt;br /&gt;
&lt;?php
}
?&gt;
&lt;br /&gt;
&lt;span class="description"&gt;&lt;?php echo $args[0]; ?&gt;&lt;/span&gt;
&lt;?php
}
}
The second step is to check which menu location has been selected and add the login/logout link to that particular location.
function cdashmm_add_login_logout_link($items, $args){
$site_url = cdashmm_get_login_page_url(); //getting the login page url that has been set in the options page.
$options = get_option( 'cdashmm_options' ); //getting the plugin options
if(isset($options['cdashmm_selected_menu'])){
$selected_menu_locations = $options['cdashmm_selected_menu'];
}else{
$selected_menu_locations = '';
}
if(cdashmm_enable_login_logout_link()){ //checking to see if the login/logout item needs to be added to the menu
if($site_url !=''){ //We wanted to add the link only if the login page url is set in the options page
if(isset($selected_menu_locations) &amp;amp;amp;&amp;amp;amp; is_array($selected_menu_locations) &amp;amp;amp;&amp;amp;amp; $selected_menu_locations != '') {
foreach($selected_menu_locations as $location){
$menu_location = $location;
if( $args-&amp;amp;gt;theme_location == $menu_location ){
$items .= cdashmm_login_logout_link($site_url);
}
}
}else{
$items .= cdashmm_login_logout_link($site_url);
}
}
}
return $items;
}
Here is the function that actually adds the link based on whether the user is logged in or not.
Advanced Custom Fields is an amazing plugin that I have been using for a while. It makes it so easy to build extra fields for WordPress sites. So, when the custom blocks feature came out, I just had to try.
Here is the first block I built to display a post from a custom post type.
Featured Business block in the editor
Featured Business Block Settings
Creating the block using acf_register_block
//Custom blocks using ACF
add_action('acf/init', 'my_acf_init');
function my_acf_init() {
// check function exists
if( function_exists('acf_register_block') ) {
acf_register_block(array(
'name' => 'featured-business',
'title' => __('Featured Business ACF'),
'description' => __('A block that display custom post type posts.'),
'render_callback' => 'my_acf_block_render_callback',
'category' => 'formatting',
'icon' => 'admin-comments',
'keywords' => array('custom post type', 'custom post'),
));
}
}
‘my_acf_block_render_callback‘ function calls the template to display the block content on the front end. The $slug will be the same as the ‘name’ specified in the acf_register_block. The ‘acf_register_block’ and the callback function can be added to your theme’s functions.php.
function my_acf_block_render_callback( $block ) {
// convert name ("acf/featured-business") into path friendly slug
("featured-business")
$slug = str_replace('acf/', '', $block['name']);
// include a template part from within the "template-parts/block"
folder
if( file_exists( get_theme_file_path("/template-parts/block/content-
{$slug}.php") ) ) {
include( get_theme_file_path("/template-parts/block/content-
{$slug}.php") );
}
}
Create the fields
I created three fields for this block. The first one is the ‘Title’ field, the second is the drop down to select a post from the business custom post type and the third field to provide an option to display ‘Featured Image’ of the post selected.
Fields in the Featured Business block
The ‘Block Title’ is a text field and and the “Display Featured Image’ is a radio button field. The ‘Select a Business’ field is a ‘Post Object’ field type and I am filtering by the post type ‘business’.
Creating a template to display the block on the front end.
The template can be placed in template-parts/block/content-featured-business.php. The file name should be content-$slug.php. The block title is displayed as a H3 tag, the post title is liked to the actual post. If display featured image is set to ‘yes’, then a featured image is displayed which is also linked to the actual post.
&lt;?php
/**
* Block Name: Featured Business
*
* This is the template that displays the featured business block.
*/
// create id attribute for specific styling
$id = 'featured-business-' . $block['id'];
// create align class ("alignwide") from block setting ("wide")
$align_class = $block['align'] ? 'align' . $block['align'] : '';
?&gt;
&lt;div id="&lt;?php echo $id; ?&gt;" class="testimonial &lt;?php echo $align_class; ?&gt;"&gt;
&lt;h3&gt;&lt;?php the_field('block_title'); ?&gt;&lt;/h3&gt;
&lt;?php $post_object = get_field('select_a_business'); ?&gt;
&lt;?php $featured_img_url = get_the_post_thumbnail_url($post_object-&gt;ID,'full'); ?&gt;
&lt;p&gt;&lt;a href="&lt;?php echo get_permalink($post_object-&gt;ID); ?&gt;"&gt;&lt;?php echo $post_object-&gt;post_title; ?&gt;&lt;/a&gt;&lt;/p&gt;
&lt;?php
if (get_field('display_featured_image') == 'Yes') {
// code to run if the above is true
?&gt;
&lt;p&gt;&lt;a href="&lt;?php get_permalink( $post_object ); ?&gt;"&gt;&lt;?php echo get_the_post_thumbnail( $post_object, 'thumbnail' ); ?&gt;&lt;/a&gt;&lt;/p&gt;
&lt;?php
}
?&gt;
&lt;/div&gt;
The block looks the same in the editor and on the front end which is very nice. One thing I found is that when I initially add the featured business block and select the business, it did not immediately show up on the back end even though the preview showed the block’s content on the front end. I had to save it as a draft and refresh my browser for the contents of the block to show up in the editor.
ACF does make it very easy to create custom blocks which can be used to build custom templates. Can’t wait to build more custom blocks.
This code is on github if you would like to get it from there. The following sites helped me with building this custom block.
wp_dropdown_categories displays the WordPress categories in a nice drop down. You can choose to display the parent and child categories in a hierarchy. Using Ajax, it is simple to display the child categories based on the selected parent category.
I wrote the WP Category Dropdown plugin to make it easy to add this dropdown to a page or the sidebar. The plugin gives you a shortcode that will let you display all the categories in a dropdown. You can select the parent category and the child categories for that parent will be displayed in another dropdown.
This feature will come in handy when you want to give your users an option to navigate easily through the number of categories you have on your site. The shortcode gives you the option to display categories from a custom post type.
The plugin can differentiate between the categories that do and do not have child categories. If the selected parent category has a child, then you will see another drop down with the list of child categories, otherwise, you will be automatically redirected to the selected category page.
The shortcode gives you an option to display only the categories with children and if there only a few categories without children, you can use “exclude” to hide these categories from the drop down.
The plugin also has an option to add a widget to the sidebar to display the dropdown categories.